导读: 最近看到朋友 GitHub 的模板个人博客界面相对于 小专栏、掘金 之类的博客社区更加清爽及定制化,也萌生了搭建属于自己的个人博客,下面就记录搭建博客的过程。
搭建
一、申请 GitHub 账户
如果想要基于 GitHub 搭建个人博客主页,首先需要有一个 GitHub 账户,没有的可以 点击此处注册 - Create your account,注册一个属于自己的 GitHub 账户。
如果已有 GitHub 账户的可以选择跳过此步骤。
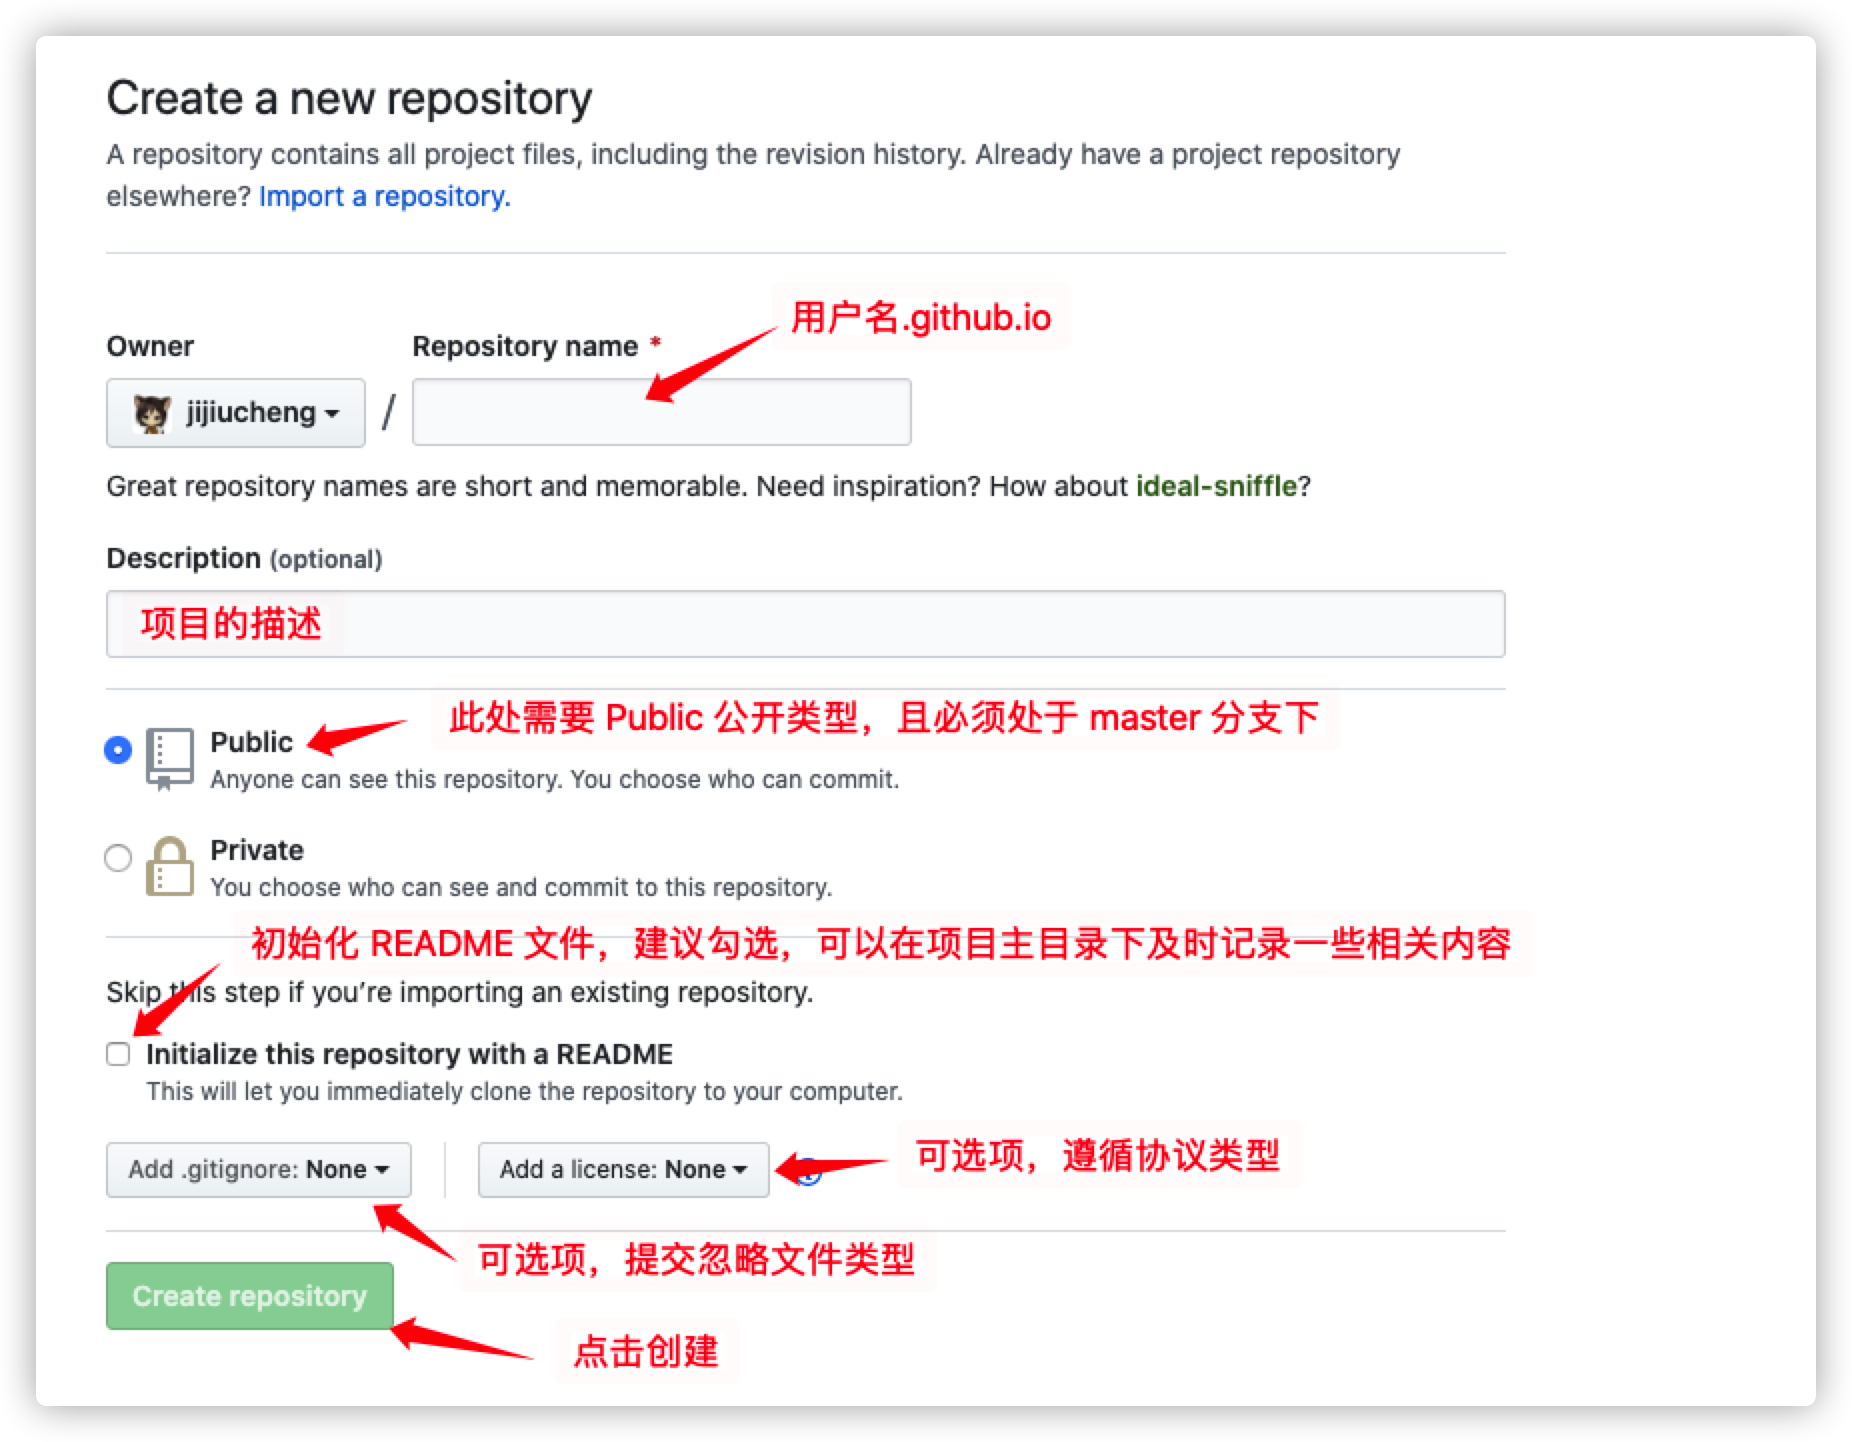
二、新建个人博客库项目
当登录注册的账户后,点击此处 - Create a new repository 创建新项目。
三、配置创建完的项目
当成功创建项目后,点击 Settings -> GitHub Pages,当出现 Your site is ready to be published at https://xxx.github.io/. 类似的提示,即代表初始的创建配置成功了。
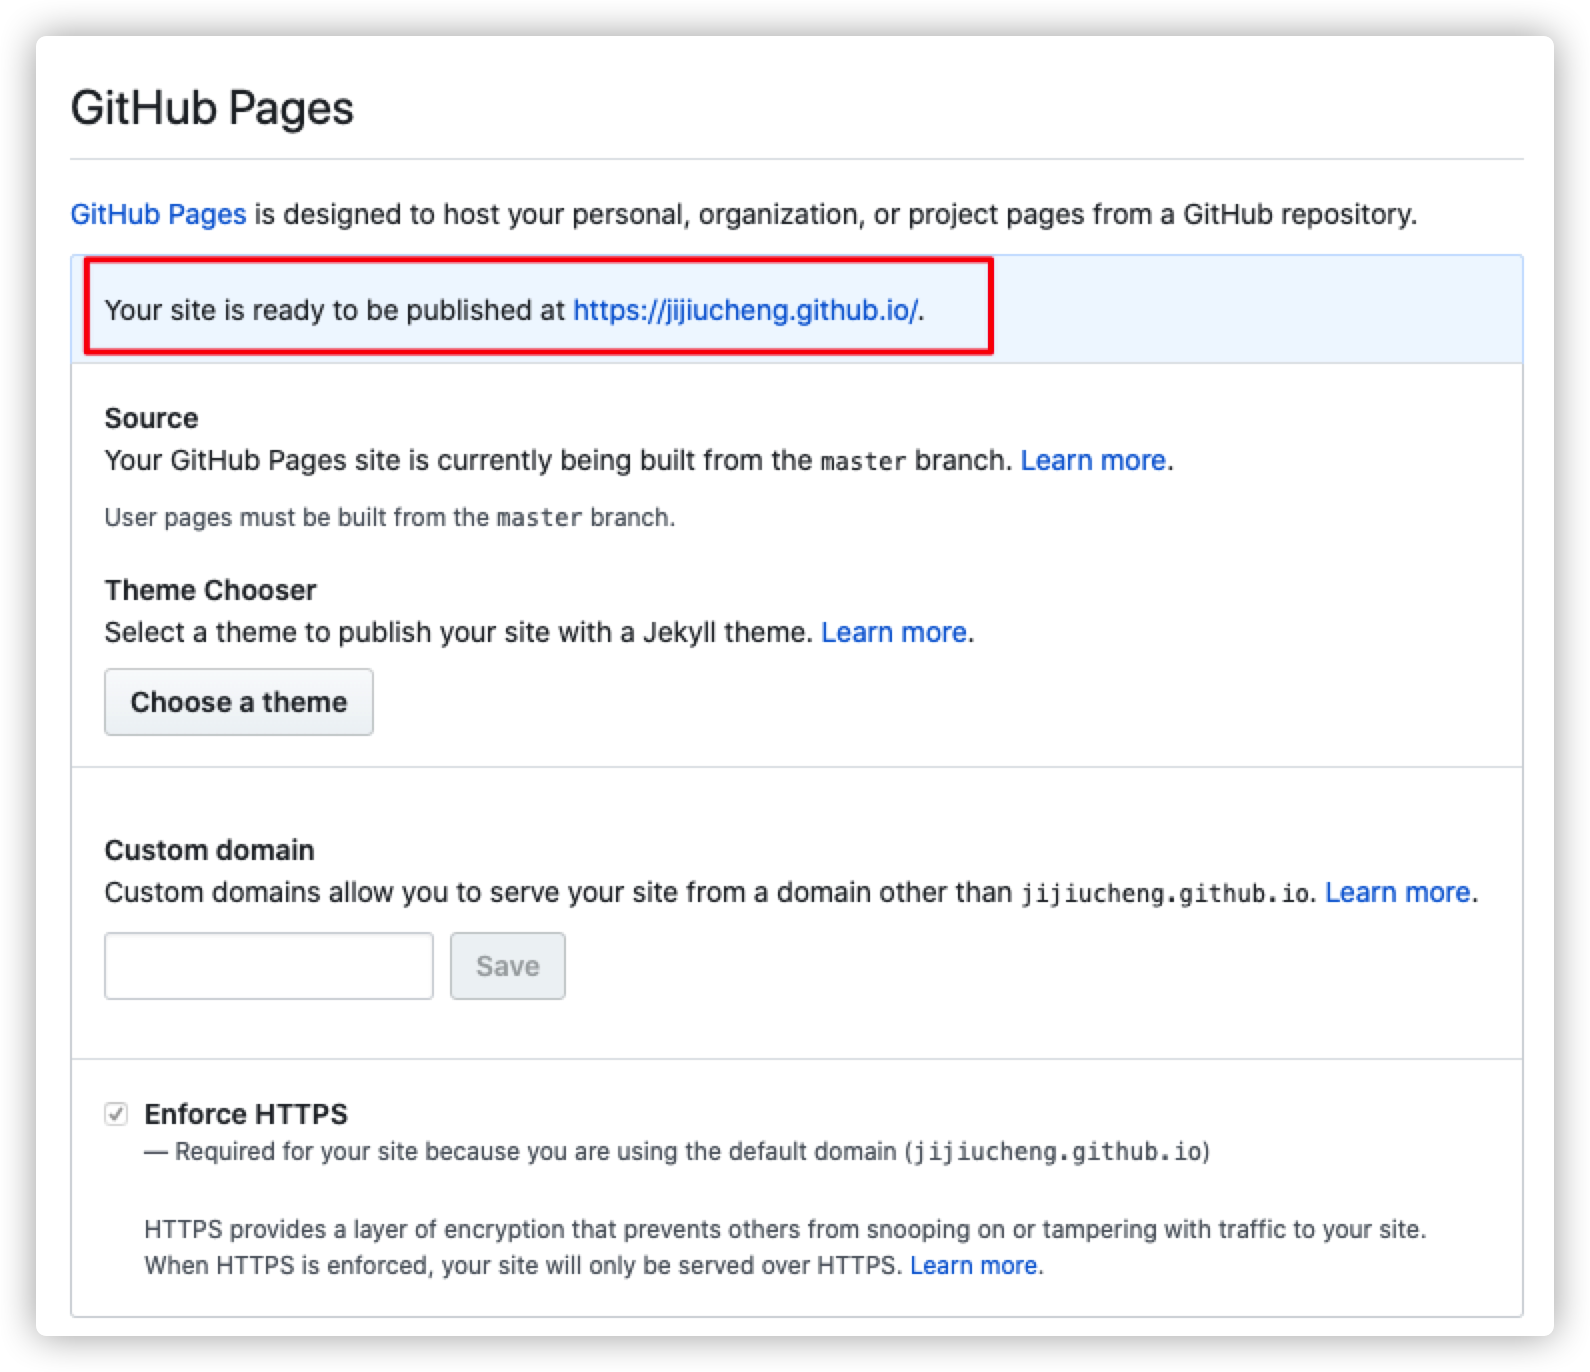
点击对应的链接即可以访问主页了,只不过此时都是一片空白,主要是因为还没有配置主题,可以选择 Choose a theme 按钮选择一个模板使用,也可以自己选择相应的模板配置。
四、配置模板主题
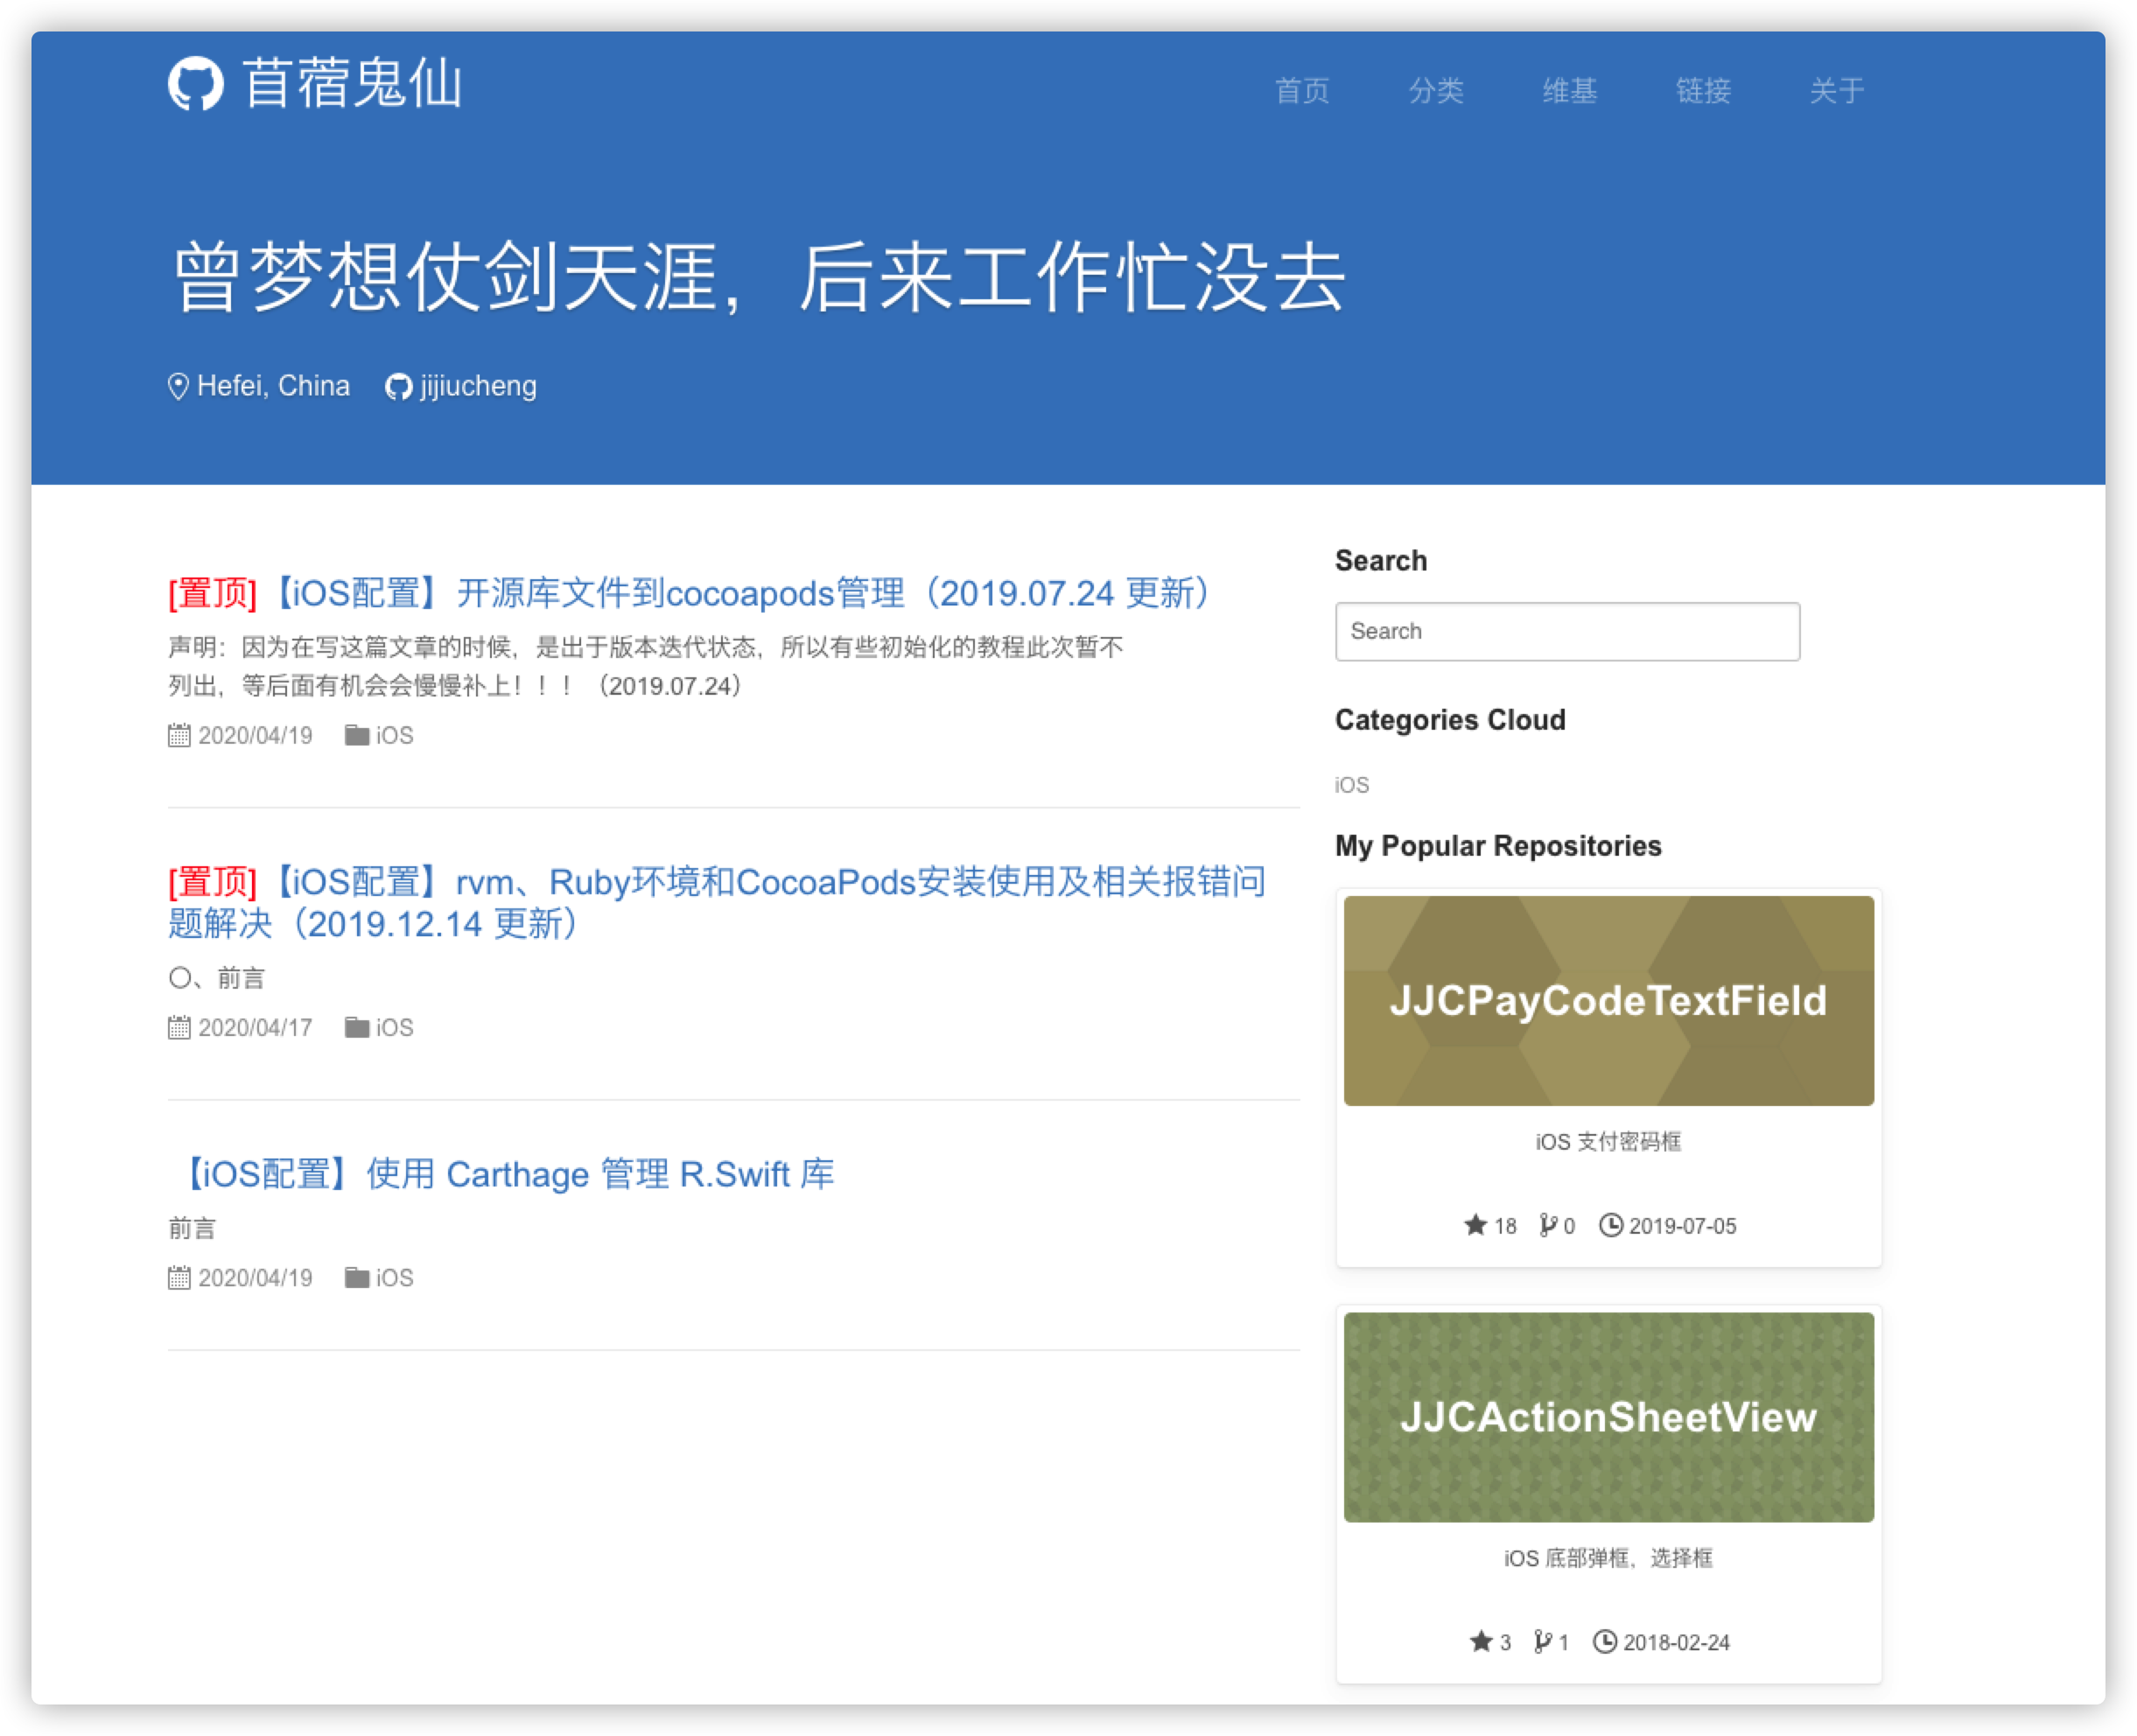
本人选择的也是 GitHub/mzlogin 主题模板,感觉界面很清爽(预览界面),最主要是博主很热诚,细心指导其中的一些细节问题。
可以根据 GitHub/mzlogin - README.md 文件中的 Fork 指南 搭建。
五、此处简要概述一下搭建的过程中的注意点(参考:)
1、clone 项目到本地:
首先需要先将本项目 clone 到自己个人博客在电脑中 clone 的根目录文件夹中,此时打开的话,会展示的是 mzlogin 的博客界面。
2、正确设置项目名称与分支:
按照 GitHub Pages 的规定,名称为 username.github.io 的项目的 master 分支,或者其它名称的项目的 gh-pages 分支可以自动生成 GitHub Pages 页面。
3、修改域名:
如果你需要绑定自己的域名,那么修改 CNAME 文件的内容;如果不需要绑定自己的域名,那么删掉 CNAME 文件。
4、修改配置:
网站的配置基本都集中在 _config.yml 文件中,将其中与个人信息相关的部分替换成你自己的,比如网站的 url、title、subtitle 和第三方评论模块的配置等。
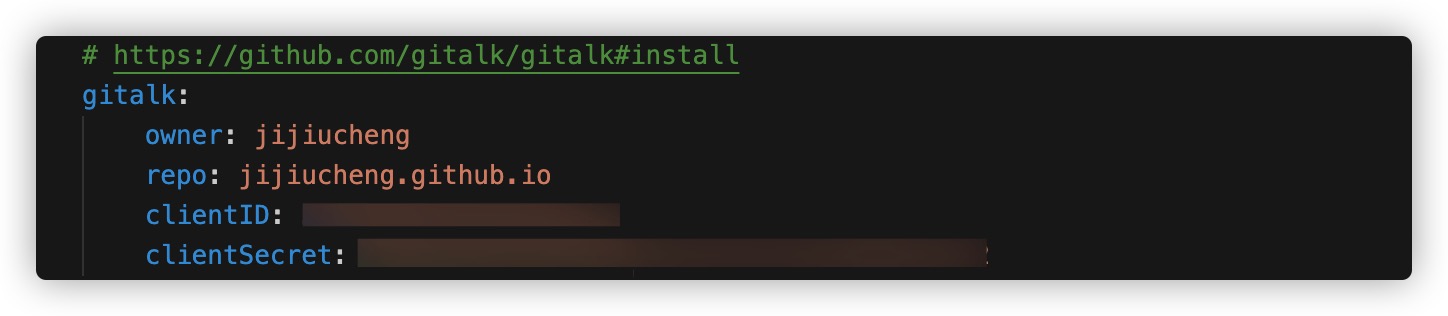
评论模块: 目前支持 disqus、gitment 和 gitalk,选用其中一种就可以了,推荐使用 gitalk。它们各自的配置指南链接在 _config.yml 文件的 Comments 一节里都贴出来了。
注意: 如果使用 disqus,因为 disqus 处理用户名与域名白名单的策略存在缺陷,请一定将 disqus.username 修改成你自己的,否则请将该字段留空。我对该缺陷的记录见 Issues#2。
5、删除原作者的文章与图片:
如下文件夹中除了 template.md 文件外,都可以全部删除,然后添加你自己的内容。
_posts文件夹中是我已发布的博客文章。_drafts文件夹中是我尚未发布的博客文章。_wiki文件夹中是我已发布的 wiki 页面。images文件夹中是我的文章和页面里使用的图片。
6、修改「关于」页面:
pages/about.md 文件内容对应网站的 「关于」 页面,里面的内容多为个人相关,将它们替换成你自己的信息,包括 _data 目录下的 skills.yml 和 social.yml 文件里的数据。
六、配置评论功能
此处我这边用的是 Gitalk,除了按照官网配置相应的信息外,可能会出现提示 Error Not Found 的错误信息,此处是因为未关联评论 issue,只需要将 repo 与之对应即可。
七、配置本地预览功能
如果没有配置本地预览功能,需要每次修改后都要将对应的代码提交到 GitHub 后,有时界面没有更新还需要删除浏览器缓存才能预览到新的界面。所以配置本地预览功能就很有必要了。
本地预览配置参考:Setting up your Pages site locally with Jekyll
注意: 因为本人是 Mac 电脑,所以是基于 Mac 环境配置的。
1、安装 Jekyll
安装 Jekyll 安装 Jekyll - Install - MacOS
① 安装 Command Line Tools
$ xcode-select --install
② 检查 Ruby 版本号:
首先需要检查 ruby 版本号,因为 Jekyll 对 ruby 有一定的要求。
Requirements
Rubyversion2.5.0or above, including all development headers (ruby version can be checked by runningruby -v)RubyGems(which you can check by runninggem -v)GCCandMake(in case your system doesn’t have them installed, which you can check by runninggcc -v,g++ -vandmake -vin your system’s command line interface)
Jekyll requires Ruby > 2.5.0. macOS Catalina 10.15 comes with ruby 2.6.3, so you’re fine. If you’re running a previous macOS system, you’ll have to install a newer version of Ruby.
③ 安装更新 Ruby:
声明:
官方推荐使用两种方式安装更新
Ruby,分别是Homebrew和rbenv,本人使用的是Homebrew方式。
使用 Homebrew 更新最新版本。
# Install Homebrew
/usr/bin/ruby -e "$(curl -fsSL https://raw.githubusercontent.com/Homebrew/install/master/install)"

brew install ruby
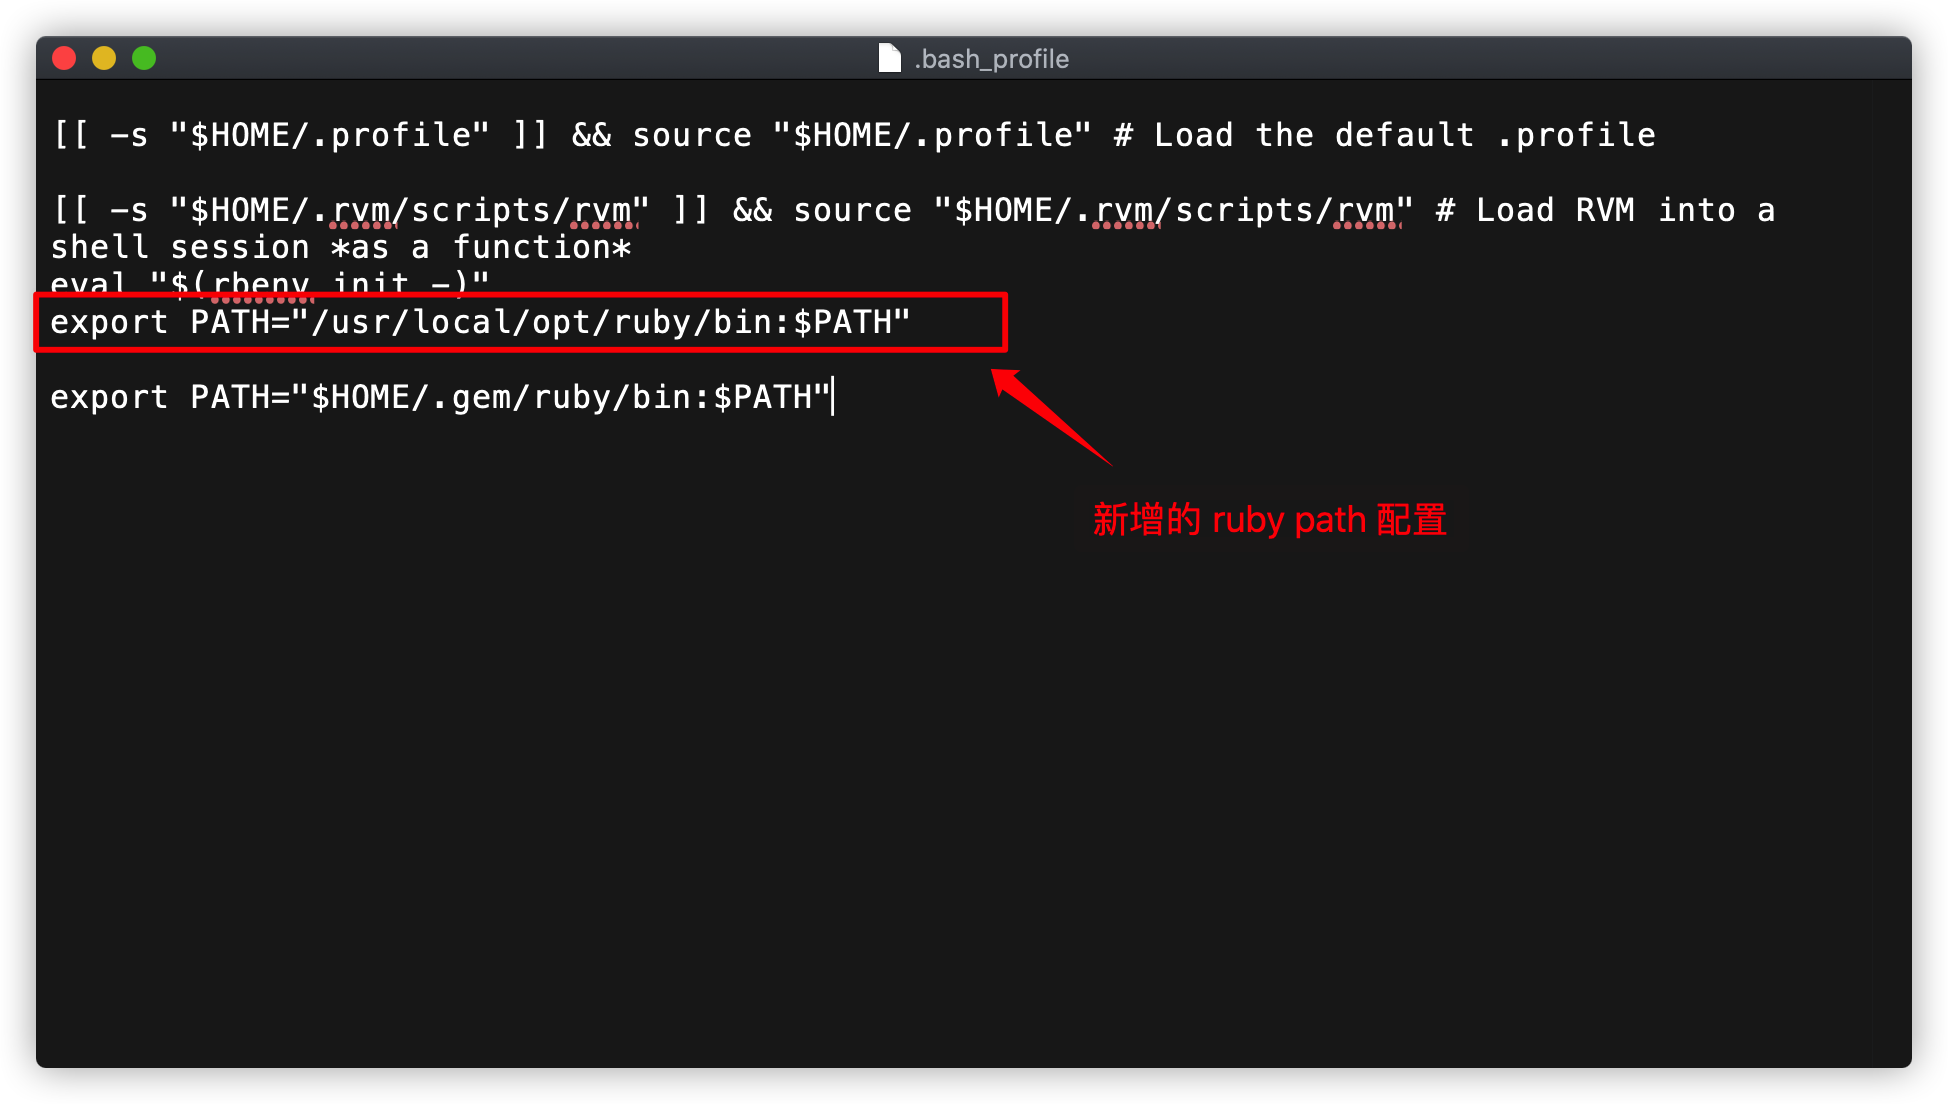
添加 brew ruby path 到 shell 配置文件里。
# 打开 .bash_profile 文件,可以通过指令 $ open ~/.bash_profile
echo 'export PATH="/usr/local/opt/ruby/bin:$PATH"' >> ~/.bash_profile
配置完成后,可以打开 .bash_profile 文件看一下配置:
检查当前 ruby 版本号:
mxgx:jijiucheng.github.io jijiucheng$ ruby -v
ruby 2.7.1p83 (2020-03-31 revision a0c7c23c9c) [x86_64-darwin19]
④ 安装更新 Bundle:
# Local Install
$ gem install --user-install bundler jekyll

# On Mojave (10.14) Because of SIP Protections in Mojave, you must run:
$ sudo gem install bundler
$ sudo gem install -n /usr/local/bin/ jekyll

# Before Mojave (<10.14) You only have to run:
$ sudo gem install bundler jekyll
mxgx:jijiucheng.github.io jijiucheng$ bundle -v
Bundler version 1.17.2
mxgx:jijiucheng.github.io jijiucheng$ bundle exec jekyll 3.8.5 new .
Could not find gem 'github-pages' in any of the gem sources listed in your Gemfile.
Run `bundle install` to install missing gems.
mxgx:jijiucheng.github.io jijiucheng$ bundle install
Fetching gem metadata from https://rubygems.org/...........
Fetching gem metadata from https://rubygems.org/.
Resolving dependencies...
Following files may not be writable, so sudo is needed:
  /Library/Ruby/Gems/2.6.0
  /Library/Ruby/Gems/2.6.0/build_info
  /Library/Ruby/Gems/2.6.0/cache
  /Library/Ruby/Gems/2.6.0/doc
  /Library/Ruby/Gems/2.6.0/extensions
  /Library/Ruby/Gems/2.6.0/gems
  /Library/Ruby/Gems/2.6.0/specifications
Fetching concurrent-ruby 1.1.6


Your user account isn't allowed to install to the system RubyGems.
  You can cancel this installation and run:

      bundle install --path vendor/bundle

  to install the gems into ./vendor/bundle/, or you can enter your password
  and install the bundled gems to RubyGems using sudo.

  Password:


Your user account isn't allowed to install to the system RubyGems.
  You can cancel this installation and run:

      bundle install --path vendor/bundle

  to install the gems into ./vendor/bundle/, or you can enter your password
  and install the bundled gems to RubyGems using sudo.

  Password:
Installing concurrent-ruby 1.1.6
Fetching i18n 0.9.5
Installing i18n 0.9.5
Fetching minitest 5.14.0
......
......
Fetching jekyll-github-metadata 2.13.0
Installing jekyll-github-metadata 2.13.0
Using mini_portile2 2.4.0
Fetching nokogiri 1.10.9


Your user account isn't allowed to install to the system RubyGems.
  You can cancel this installation and run:

      bundle install --path vendor/bundle

  to install the gems into ./vendor/bundle/, or you can enter your password
  and install the bundled gems to RubyGems using sudo.

  Password:
Installing nokogiri 1.10.9 with native extensions
Fetching html-pipeline 2.12.3
Installing html-pipeline 2.12.3
Fetching jekyll-mentions 1.5.1
......
......
Fetching terminal-table 1.8.0
Installing terminal-table 1.8.0
Fetching github-pages 204
Installing github-pages 204
Bundle complete! 1 Gemfile dependency, 85 gems now installed.
Use `bundle info [gemname]` to see where a bundled gem is installed.
Post-install message from dnsruby:
Installing dnsruby...
  For issues and source code: https://github.com/alexdalitz/dnsruby
  For general discussion (please tell us how you use dnsruby): https://groups.google.com/forum/#!forum/dnsruby
Post-install message from sass:

Ruby Sass has reached end-of-life and should no longer be used.

* If you use Sass as a command-line tool, we recommend using Dart Sass, the new
  primary implementation: https://sass-lang.com/install

* If you use Sass as a plug-in for a Ruby web framework, we recommend using the
  sassc gem: https://github.com/sass/sassc-ruby#readme

* For more details, please refer to the Sass blog:
  https://sass-lang.com/blog/posts/7828841

Post-install message from html-pipeline:
-------------------------------------------------
Thank you for installing html-pipeline!
You must bundle Filter gem dependencies.
See html-pipeline README.md for more details.
https://github.com/jch/html-pipeline#dependencies
-------------------------------------------------
mxgx:jijiucheng.github.io jijiucheng$ bundle -v
Bundler version 2.1.4
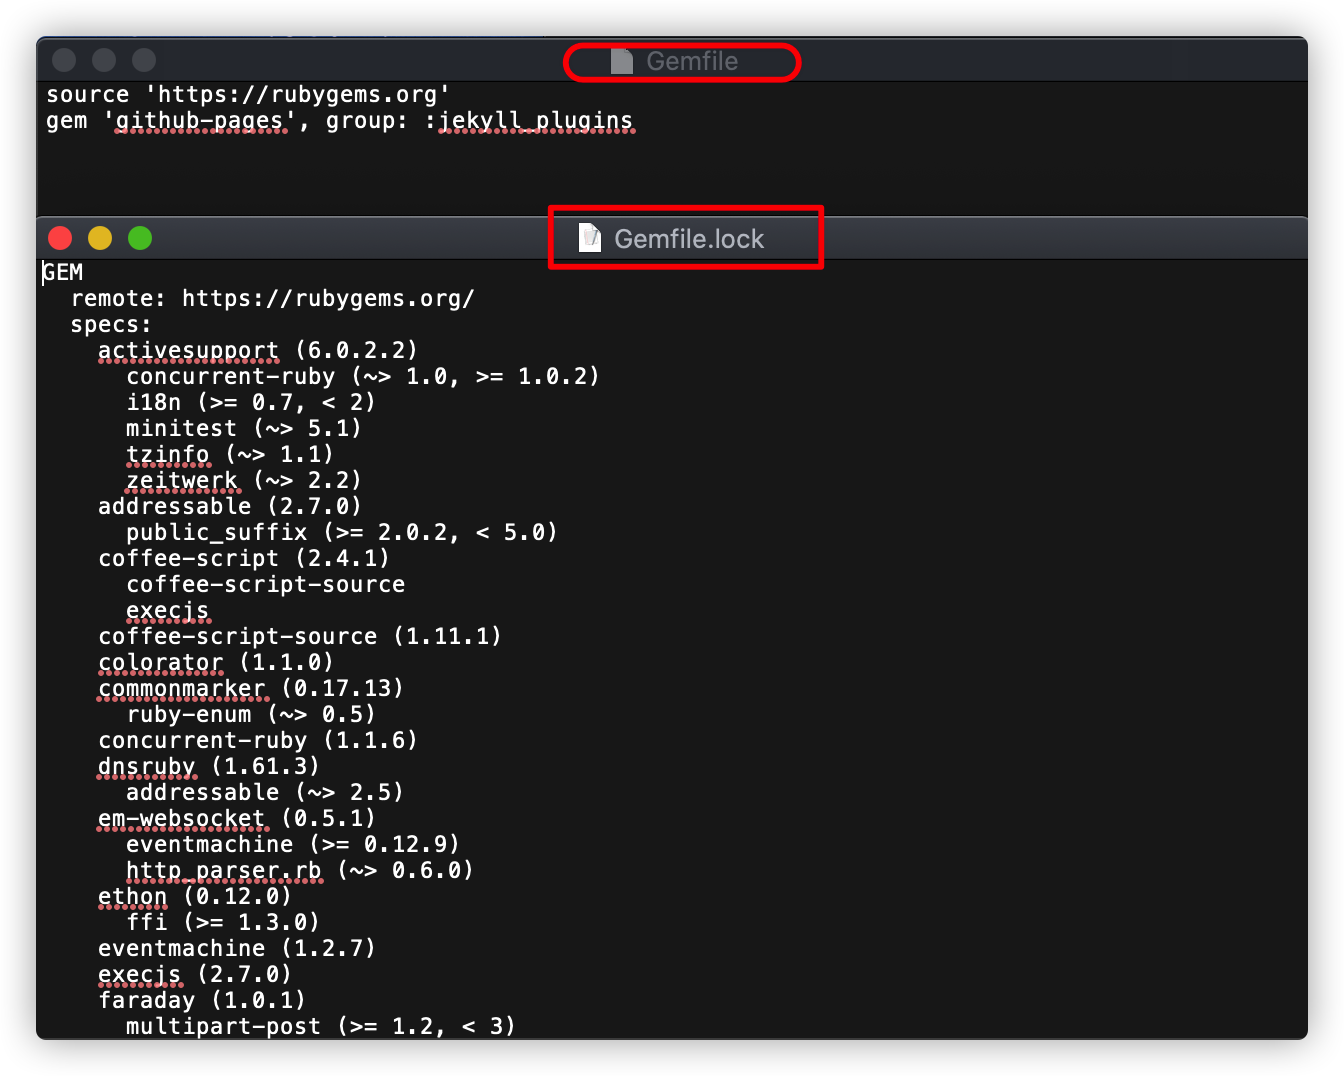
2、创建 Jekyll Site
参考链接:Jekyll - Creating a GitHub Pages site with Jekyll
按照该链接下的 Creating your site 步骤创建完成后,会出现两个文件 Gemfile 和 Gemfile.lock。
$ cd xxx.github.io

# If you installed Bundler:Creates a Jekyll site in the current directory
$ bundle exec jekyll VERSION new .

# If you don't have Bundler installed:Creates a Jekyll site in the current directory
$ jekyll VERSION new .

# Open the Gemfile that was created and follow the instructions in the Gemfile's comments to use GitHub Pages.
# If you want to use GitHub Pages, remove the "gem "jekyll"" above and uncomment in the line below. To upgrade, run 'bundle update github-pages'.
# gem "github-pages", group: :jekyll_plugins
$ gem "github-pages", "~> VERSION", group: :jekyll_plugins
3、运行本地的 Jekyll Site
mxgx:jijiucheng.github.io jijiucheng$ bundle exec jekyll serve
Configuration file: /Users/jijiucheng/Documents/GitHub/MyGitHub/jijiucheng.github.io/_config.yml
       Deprecation: The 'gems' configuration option has been renamed to 'plugins'. Please update your config file accordingly.
            Source: /Users/jijiucheng/Documents/GitHub/MyGitHub/jijiucheng.github.io
       Destination: /Users/jijiucheng/Documents/GitHub/MyGitHub/jijiucheng.github.io/_site
 Incremental build: disabled. Enable with --incremental
      Generating...
/Users/jijiucheng/.rvm/gems/ruby-2.7.1/gems/jekyll-3.8.5/lib/jekyll/convertible.rb:41: warning: Using the last argument as keyword parameters is deprecated
/Users/jijiucheng/.rvm/gems/ruby-2.7.1/gems/jekyll-3.8.5/lib/jekyll/convertible.rb:41: warning: Using the last argument as keyword parameters is deprecated
......
......
/Users/jijiucheng/.rvm/gems/ruby-2.7.1/gems/jekyll-3.8.5/lib/jekyll/tags/include.rb:194: warning: Using the last argument as keyword parameters is deprecated
/Users/jijiucheng/.rvm/gems/ruby-2.7.1/gems/jekyll-3.8.5/lib/jekyll/tags/include.rb:194: warning: Using the last argument as keyword parameters is deprecated
                    done in 6.102 seconds.
 Auto-regeneration: enabled for '/Users/jijiucheng/Documents/GitHub/MyGitHub/jijiucheng.github.io'
jekyll 3.8.5 | Error:  Address already in use - bind(2) for 127.0.0.1:4000
Traceback (most recent call last):
	39: from /usr/local/opt/ruby/bin/bundle:23:in `<main>'
	38: from /usr/local/opt/ruby/bin/bundle:23:in `load'
	......
	......
	 2: from /usr/local/Cellar/ruby/2.7.1_1/lib/ruby/2.7.0/socket.rb:765:in `block in tcp_server_sockets'
	 1: from /usr/local/Cellar/ruby/2.7.1_1/lib/ruby/2.7.0/socket.rb:201:in `listen'
/usr/local/Cellar/ruby/2.7.1_1/lib/ruby/2.7.0/socket.rb:201:in `bind': Address already in use - bind(2) for 127.0.0.1:4000 (Errno::EADDRINUSE)
注意:
有时候可能会出现本地预览失效的问题,无法预览,可能是因为本地预览的服务关闭了,可以通过终端重启本地预览服务,或者将该服务加入后台程序。
# 启动本地预览服务(关闭终端该服务会关闭,本地预览失效)
$ bundle exec jekyll serve

# 启动本地预览服务(加入后台程序)(nohup <command> & 一般的命令都能这样后台执行)
$ nohup bundle exec jekyll serve &
有时候凌晨编写的文档,通过本地预览无法编译出对应的预览文件,这个经过 GitHub - mzlogin 大佬的提示,发现这个编译是有时区的,
jekyll默认使用UTC时间,而UTC时间是比china的要慢的。修改方法:修改
_config.yml中timezone: '+0800'参考资料:
4、预览本地个人博客
预览本地个人博客:http://localhost:4000
参考链接
- 简书 - Noah牛YY - 使用 GitPage 搭建个人博客
- GitHub - mzlogin
- GitHub - mzlogin/码志 - 个人博客
- GitHub - 评论系统:GitTalk
- 本博客模板常见问题 Q & A
- gitalk提示Error Not Found
- 本地预览配置参考:Setting up your Pages site locally with Jekyll
- 【iOS】rvm、Ruby环境和CocoaPods安装使用及相关报错问题解决(2019.12.14 更新)
- Jekyll
- Jekyll - Install - MacOS
- Jekyll - Creating a GitHub Pages site with Jekyll
- CSDN - think_ycx - jekyll _config timezone(凌晨编译无法预览问题)
- GitHub - jekyll - timezone is not read. #3879
版权声明
原文作者:苜蓿鬼仙(苜蓿、jijiucheng)
原文链接:GitHub.io - 苜蓿鬼仙 - 【Blog】基于 GitHub-PageHome 搭建个人博客
发表日期:2020/04/22 17:00:00
更新日期:2021/03/25 20:00:00
-
GitHub:GitHub - jijiucheng
个人博客:GitHub.io - 苜蓿鬼仙
小专栏:小专栏 - 苜蓿鬼仙
掘金:掘金 - 苜蓿鬼仙
微博:微博 - 苜蓿鬼仙
公众号:微信 - 苜蓿小站
小程序:微信 - 苜蓿小站
文档信息
- 本文作者:苜蓿鬼仙
- 本文链接:https://jijiucheng.github.io/2020/04/22/Blog-Build/
- 版权声明:自由转载-非商用-非衍生-保持署名(创意共享3.0许可证)